Chess Set
“BRING OUT Y’LEAD!”

…as the old Monty Python skit (from The Holy Grail, 1975) kinda said. But instead of bringing out the ‘dead,’ in this month’s Chessay we’ll be bringing out the ‘lead.’ In this case from a late 1950s ‘Grandmaster’ or ‘GM’ set. A classic design that dominated Soviet chess tournaments (in several variations) well into the 1980s.
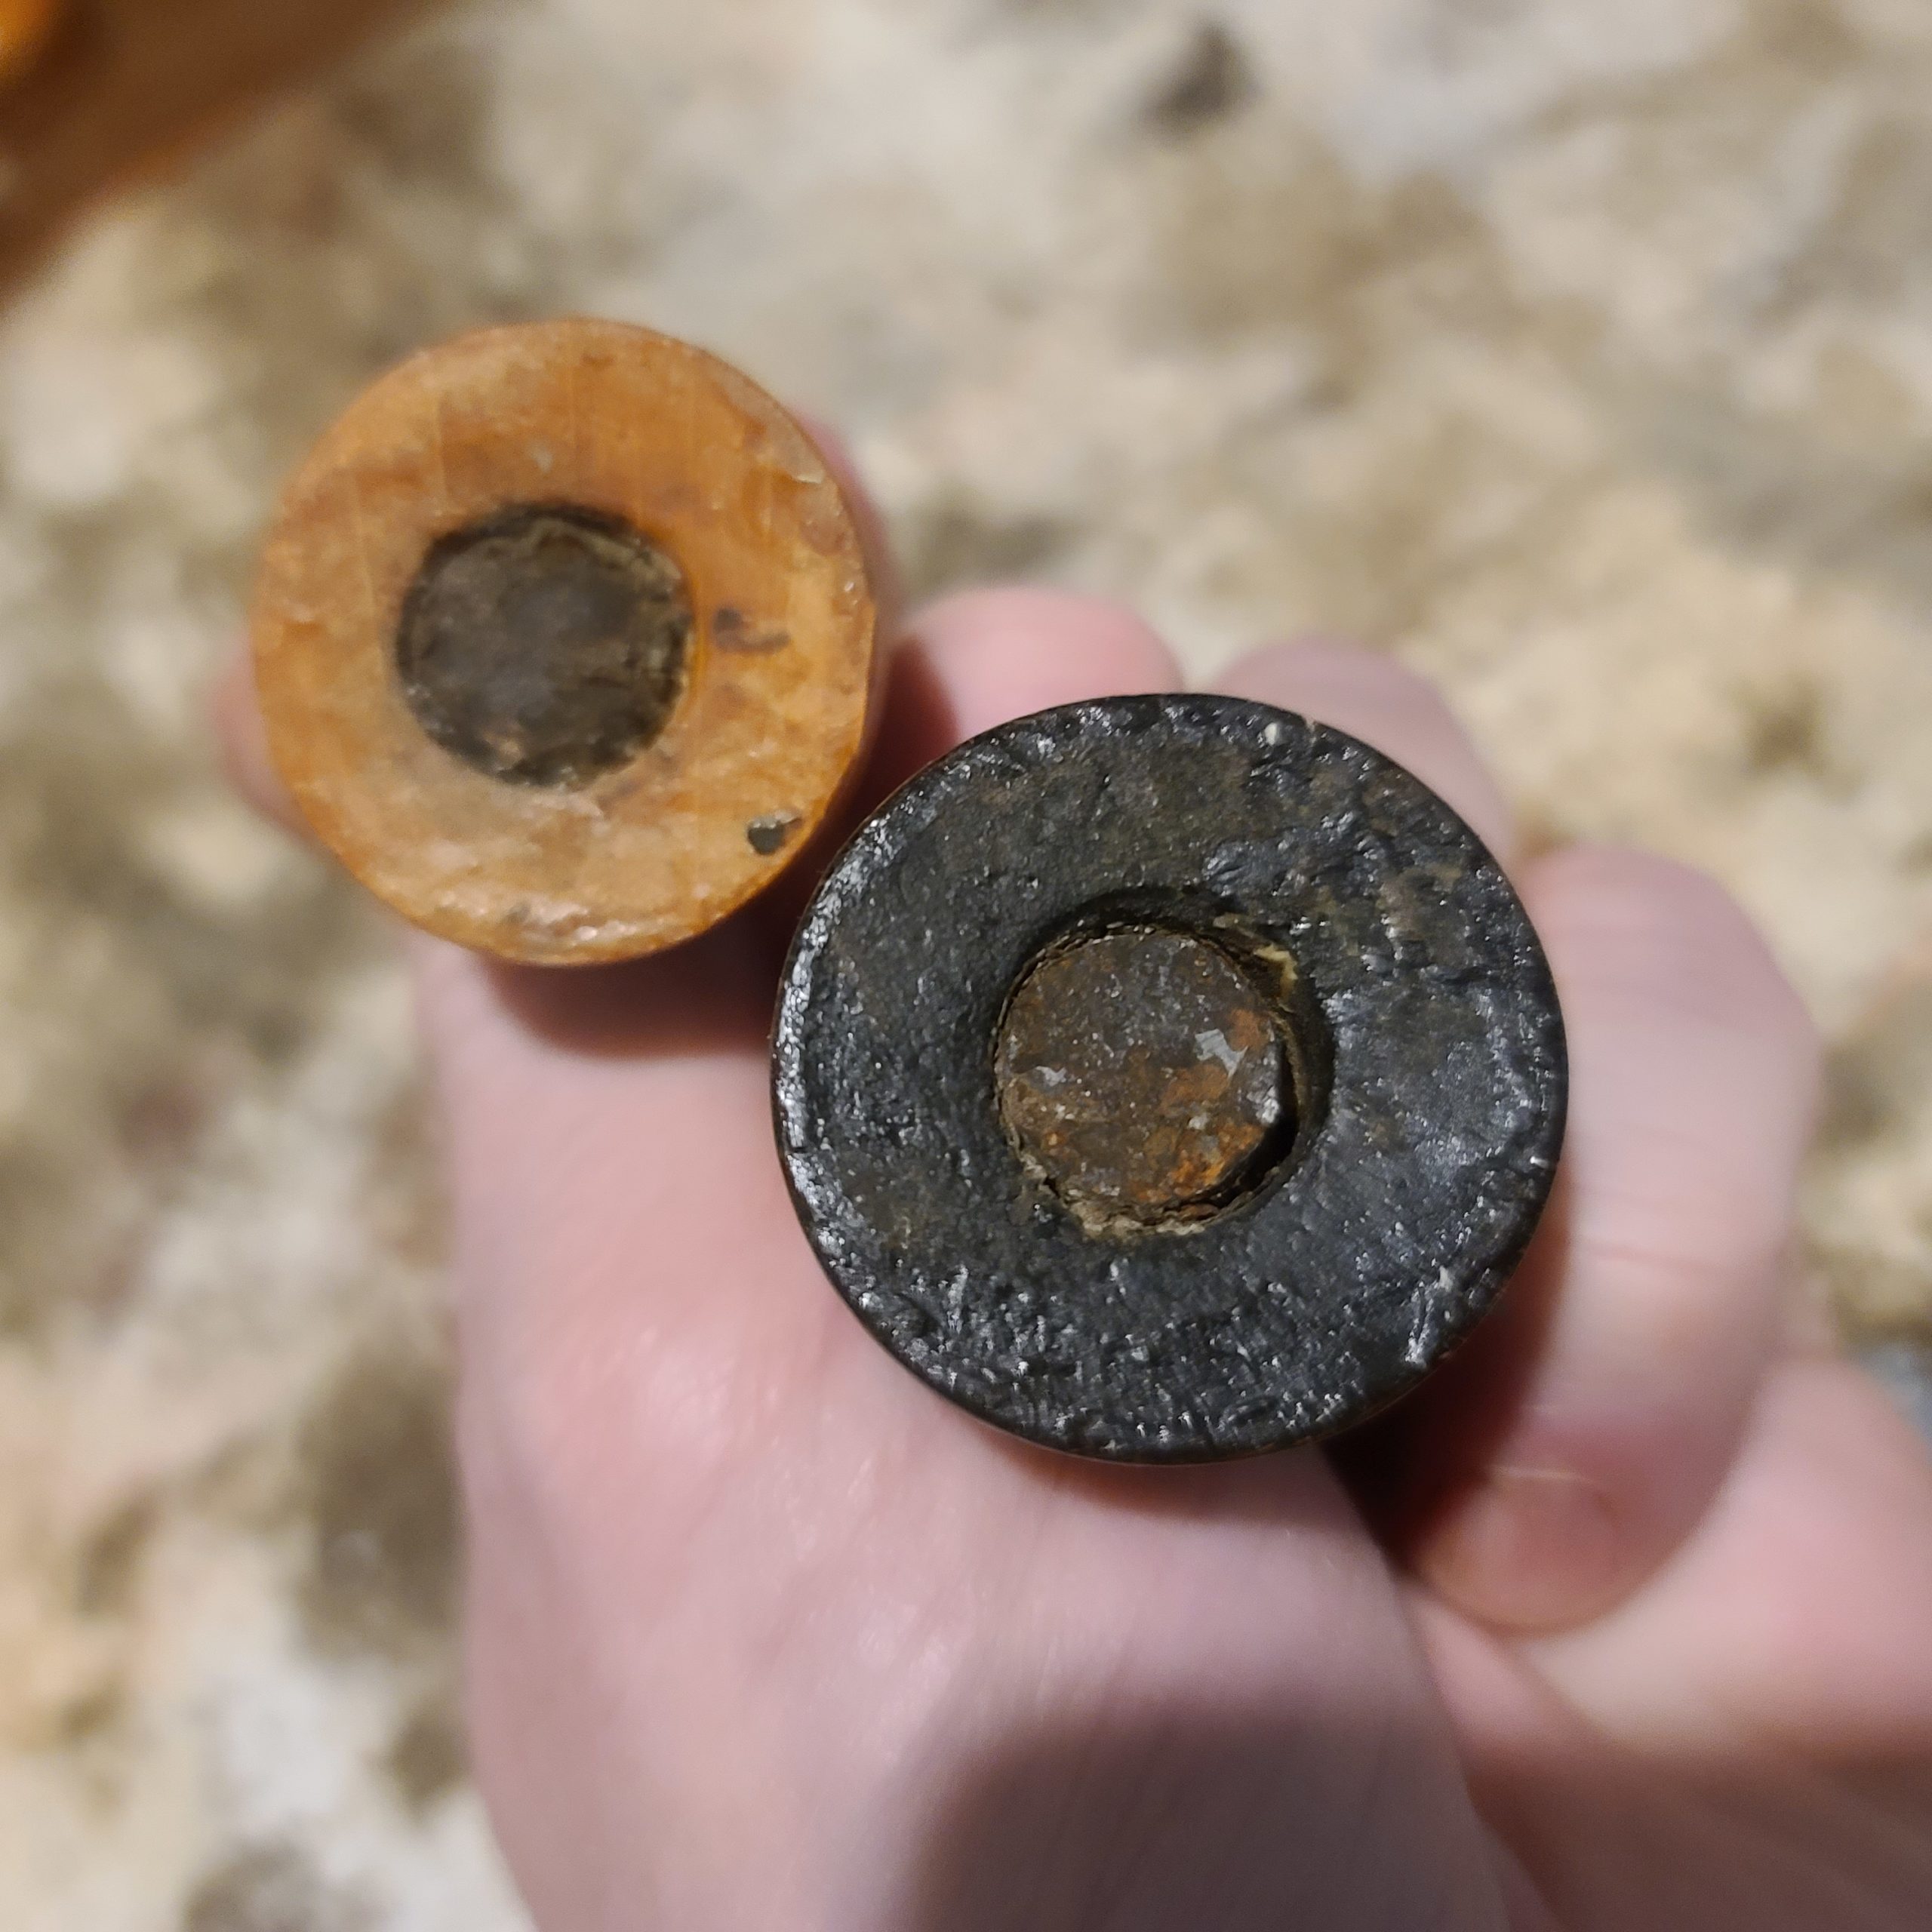
There are three main reasons for removing these old lead weights; the most common being that they rattle, because whatever glue was originally used has simply shrank over time causing the weights to jiggle about – willy-nilly – in their little cavities held in place only by the material covering their bases. Secondly, much like ivory, importing/exporting lead is illegal in some parts of the world, so in order to send a vintage set to a friend, fellow collector, or customer the original weight needs to be removed and replaced with either stainless steel or some other non-lead based heavy-duty fillers, which have thankfully become more readily available over the past decade or so. The third reason (a very common complaint regarding this particular GM3 design) is that it just feels too bloody light! It’s a LARGE, MANLY set with HUGE bases – so FILL‘EM FULLA LEAD for Christ’s sake! My exact intention, by the way, but before we can do that we have to ‘bring out the lead!’ And this is easier said than done, as many of these weights have corroded over the years, or having lost their pads, settled into place like Excalibur (SEE PIC 1, below) requiring some patience, gentleness and exactitude in extracting them from their lodgings without damaging or splitting the bases.

It’s quite clear that these two pieces lost their felt some time ago and have imbibed their good share of vino and vodka ever since. Looking for a point of entry, I’m going to score a few divits for the 2mm drill bit using a sharp tool. These old weights are in good and solid but the black piece, as is evident, has a natural angle to pry the weight out at 12, 2, and 4’o’clock. For this I use a busted steel tool from a carving set but anything slender and strong you have at hand will suffice – it’s just a matter of leverage once the holes are drilled. In PIC 2 (below left) you can see where I’ve drilled into the base at all angles but found leverage between 3 and 9 o’clock, sometimes it’s just a guessing game as PIC 3 (below right) explains perfectly – some pieces will always be more ‘work’ (read: a royal pain in the arse) than others – the king was a pushover!


Now we have the weight out. But now we need the weight in. In fact, more than double the amount of weight! Therefore, we need to chuck some wood, as the wood-chucker said. For this task I slip this handy little wood-chucker in the Dremel (PIC 4, below left– don’t ask me what its proper name is!) and on 15,000 rpm very carefully bore a larger cavity using slow semi-circular motions, always keeping the tip central, aimed towards the upper core of the stem (see PIC 5, below right) – you don’t want to accidentally bore through into the exterior of the base! If you’re attempting something like this for the first time (and this applies to everything I say in general) practice on old bits of wood first – a good few practice runs will give you a feel for the tool-bit and better confidence for the main task at hand – just like practicing a new opening at chess … but let’s get the set properly weighted first!


After the conclusion of our careful excavations we can slip in the extra weight. I want this set heavy, so I’m going to bite the bullet and use lead – ƒµ©≤ it! Lead is heavier than any alternative I know and I want this set to be heavy! There are many forms of lead options available here in Upper North America (sinkers/putty/poured, etc.) and many opinions on which is best, and of course, there are cases for every option. I’m a keen fisherman, however, and the lead (and now steel) sinkers I’ve used over the years come in a plethora of different shapes and sizes and the conical ones are especially handy for the weighting of chess pieces. Also, I’m fortunate enough to have a sportsman’s store fairly close by so have ready access to bird-shot, which is small enough to make up any weight to a precise amount should you be short a few grams – in PICS 6 & 7 (below) you can see I was a tad shy, so I added a few pellets to make up the weight. The ‘low-tack’ green tape on the king simply keeps the weight in when weighing and BANG ON! 30g Rooks and 50g Kings. Nicey!


The rest is now plain sailing. Remove the weights and add a small amount of filler to the cavity, enough for the weight to sink back into. I use a brand here in Canada that’s been my go-to for many years during my commercial/historical restoration work which is specifically used for “big hole repair” – say no more, to carry on the Monty Python theme. It’s basically an interior/exterior polyfilla product (PICS 8 & 9, below) that WILL NOT SHRINK OR CRACK. Find that description in the product info (wherever you are in the world) and you’re in business. We have a tortuously hot summer and a teeth-chatteringly chilly winter here in Toronto and this product hasn’t let me down once in over 20 years – and it’s a breeze to work with.


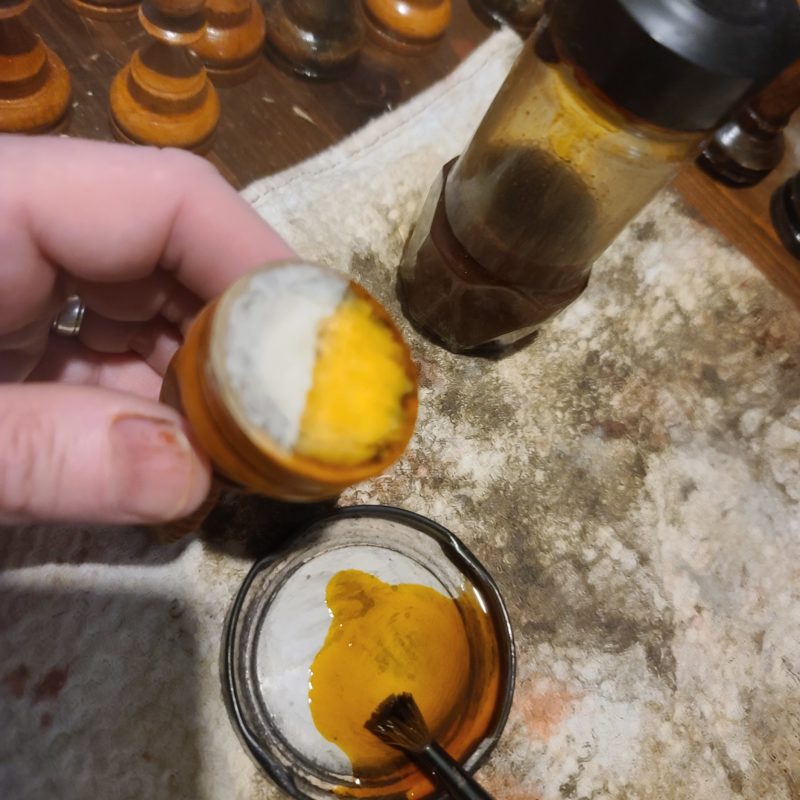
Well that being said, we’re just about done for this month’s Chessay, but here’s a parting tip, en passant: Once the pieces are weighted, filled, and sanded I brush the bases with a 50/50 mixture of shellac and methyl hydrate (see PIC 10, below), just for the hell of it – as I’m super superstitious! But seriously, this gets rid of any dust particles and helps whatever material you are using to cover the bases adhere properly. Not an essential step, by any means, but why not? It just makes me feel a whole lot better about things – and I hope it will make you feel good, too! And what better parting words…

Good luck with your future projects, Schachers.
As always – Check you later!
All rights copyright Alan Power, The Chess Schach, September 2020.

I have a small collection of Ukraine, Bulgarian and mostly Russian sets from the 50s. I add weights by using tungsten soap box weights. They come in 3/8 inch barrels from 1/2 oz to 1/16 oz. Drill down the middle as deep as you dare and drop some super glue first and then the weights. I also drill small holes around the center and drop in some lead shot for little extra weight. My best was to get a set to low 40 oz range. They are expensive though. Cost over 20.00 US for 4 oz kit. Love your site. Full of great info.